As part of the ArcGIS Platform, the GeoEvent Extension for Server enables real time data processing and works seamlessly with your other ArcGIS software. Several of our clients have a need to monitor their business data in real time, and need to track their vehicles / assets to ensure all business processes run smoothly. ArcGIS GeoEvent Extension for Server enables an organisation to filter and process their event data in real-time and this allows them to connect and view virtually any type of streaming data from their device or office.
Setting up the GeoEvent Extension for ArcGIS Server can be tricky and in this blog we hope to cover all the necessary steps to make it work. We have implemented GeoEvent Extension for Server mostly at organisations that need to view the near real time location of their vehicles – consuming telematics data. In our example the data we are using has the following records:
- vehicle id
- event time
- ignition on or off
- speed of vehicle (km/hr)
- g-force data
One of the requirements is to send out notifications to both the delivery service manager and to the delivery recipient. Three types of notifications are required for this scenario:
- when vehicle enters a dangerous zone (e.g. a known hijacking zone)
- when vehicle is driving above the speed limit
- when driver is within 5 km of the location where the parcel is being delivered
The driver behaviour warnings are sent to the delivery service manager, while the delivery recipient is notified that the driver is close to delivery.
- Create an empty feature class in an enterprise database using the schema of the csv file.
You can download the xlsx file and convert it to csv.
Note: use the coordinates in the csv file to create the feature class and delete all the records using the truncate tool.
2. Create a zoning / geofences feature class in the enterprise geodatabase.
Note: create domains in the geodatabase for the type of zone e.g. Dangerous / Buffer; and style the data accordingly.
3. Publish a map service to ArcGIS Server.
Note: feature access must be enabled (both datasets must be from the same enterprise geodatabase).

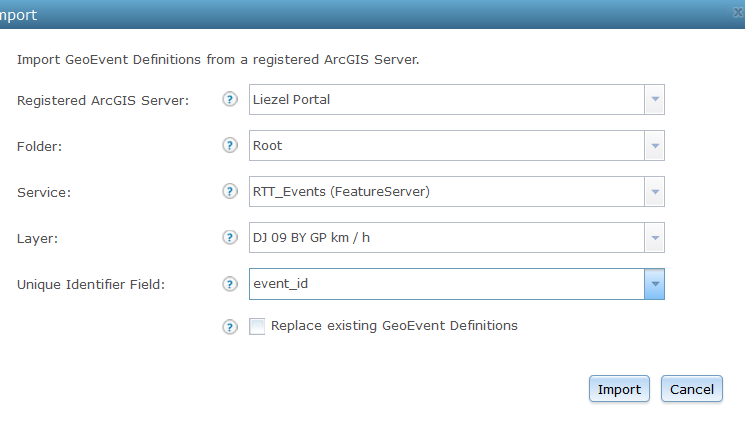
4. Import the GeoEvent Definitions using the ArcGIS Server feature service.
Note: Make sure the ArcGIS Server or Portal is registered with GeoEvent Server. Use the tracking layer (step 1).
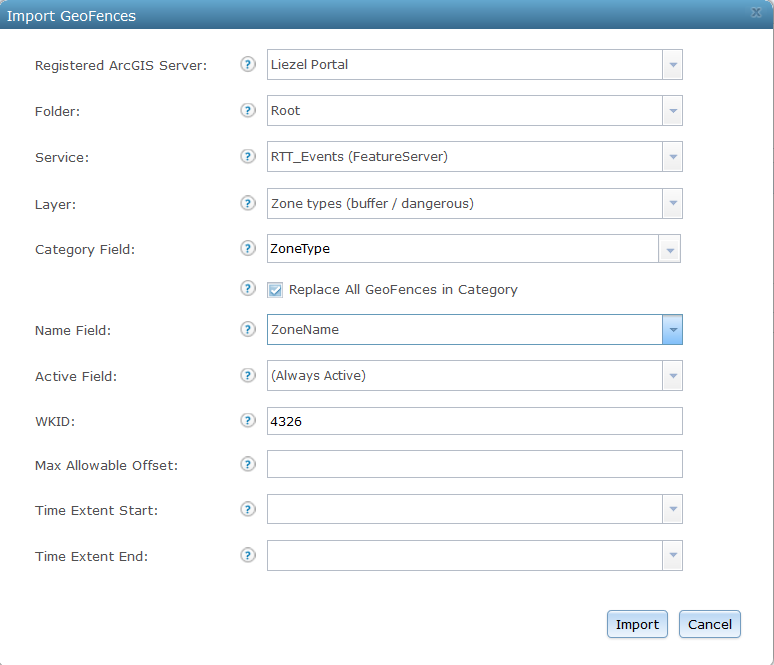
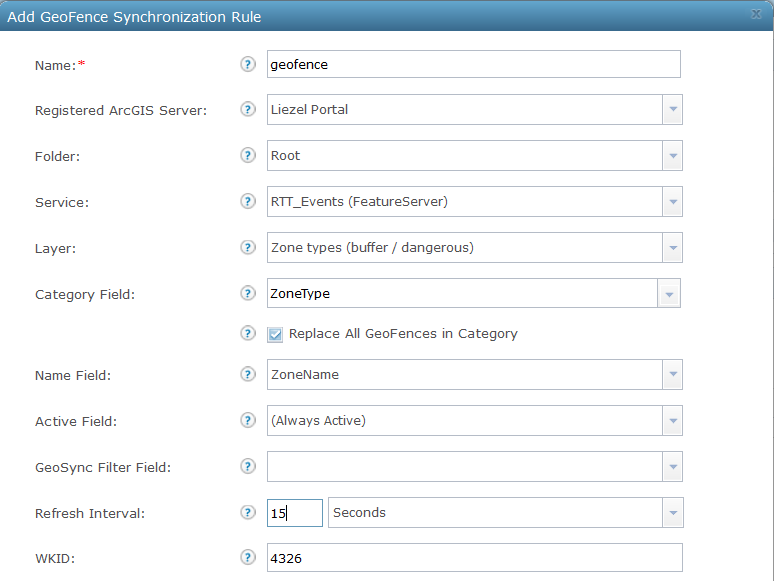
 5. Import the GeoFences and create GeoFence Synchronization Rules using the ArcGIS server feature service.
Note: Use the zoning / geofences layer (step 2).
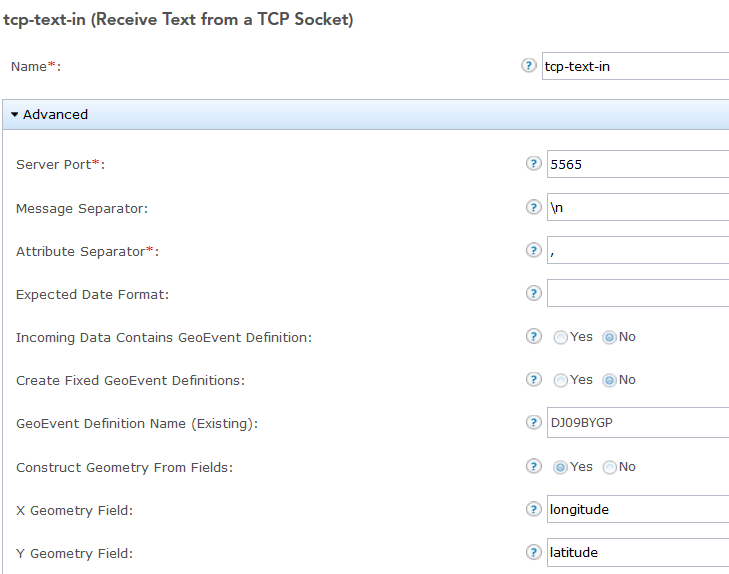
6. Add and configure the csv file as an input service.
Note: use the Receive Text from a TCP Socket for the Input Connector. The Server Port must match the port that will be used in the simulator.
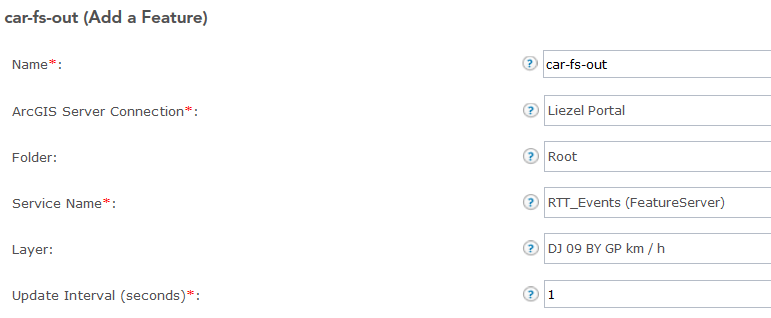
7. Add and configure the tracking layer feature service as an output service.
Note: use the Add a Feature for the Output Connector.
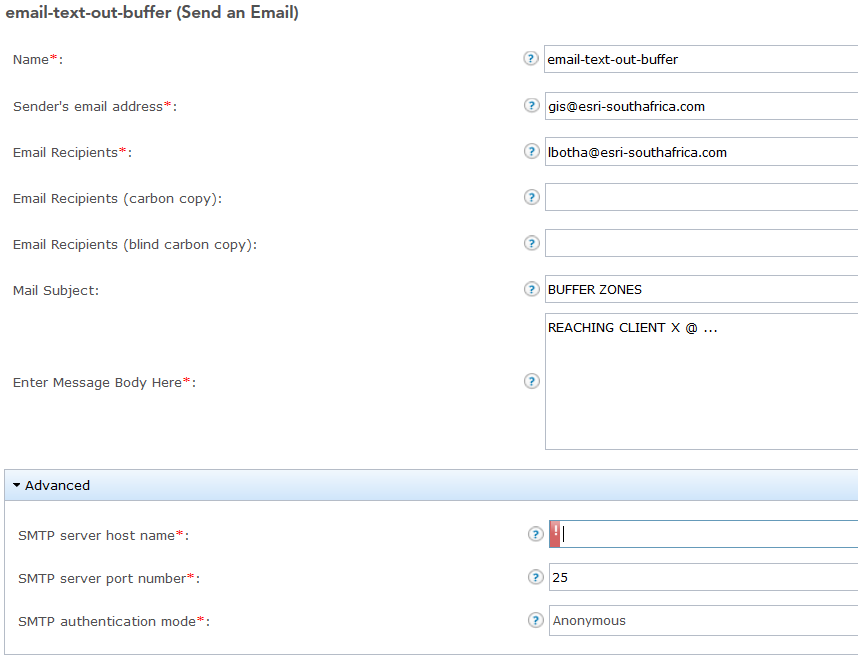
8. Various notifications can be created to inform the delivery service manager or the delivery recipient. In this example Send an Email was used as an Output Connector.
Note: Access to an SMTP server is required – contact your system administrator for help with this, or you can use gmail for testing purposes.
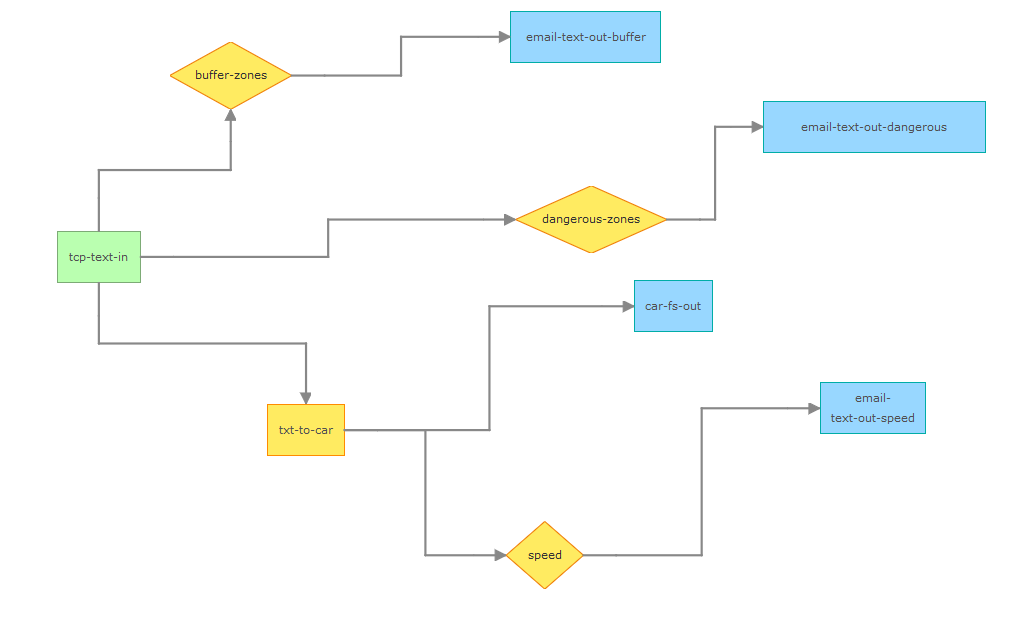
9. Create and Publish a GeoEvent Service to connect your inputs (step 6) to the various outputs (step 7 & 8).
Note: txt-to-car is a processor; speed, buffer-zones and dangerous-zones are all filters.
txt-to-car: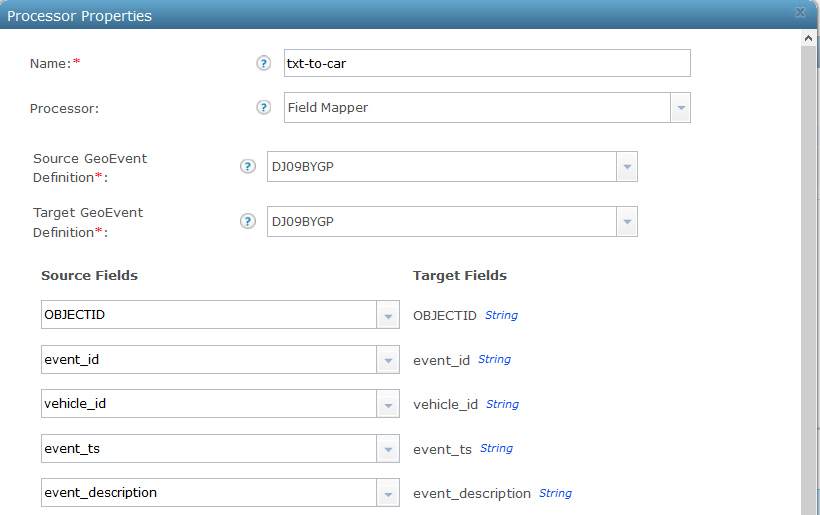
speed: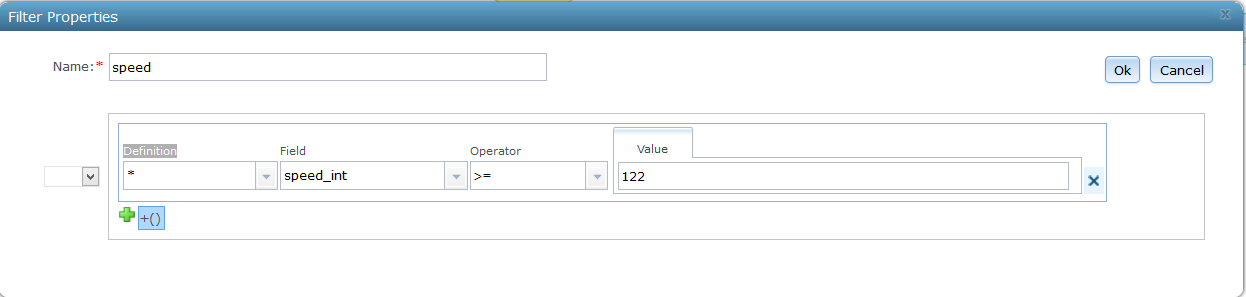
buffer-zones: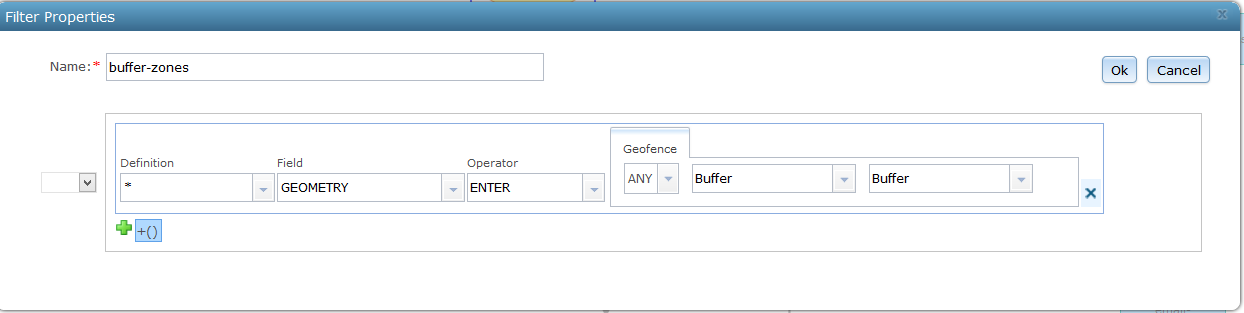
dangerous-zones: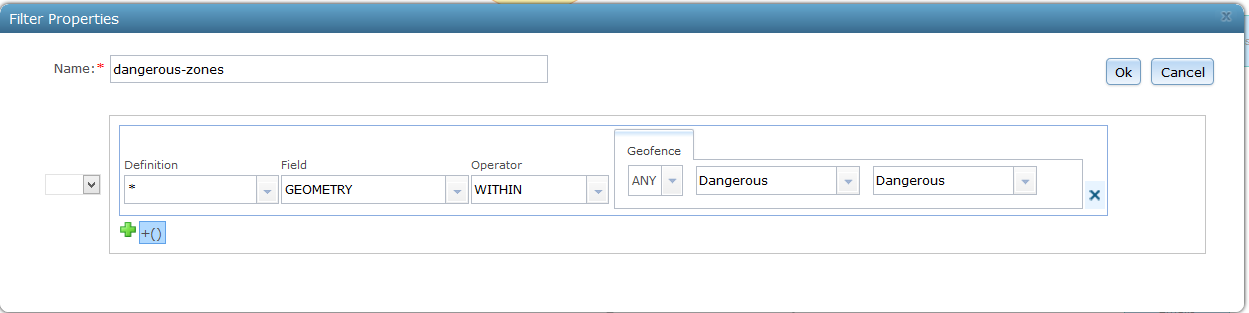
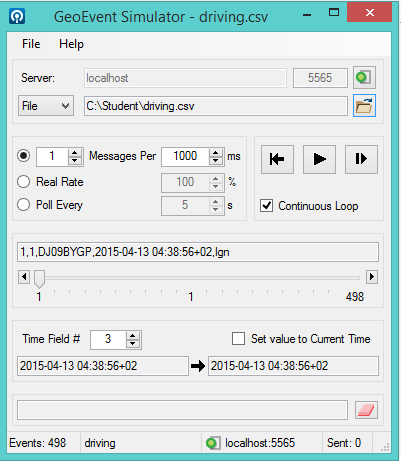
10. Upload the csv file in GeoEvent Simulator.
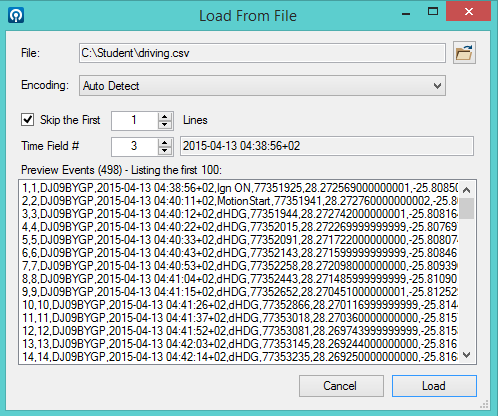
11. Connect to the server and port (step 6). Set all the other settings and play the simulator.
The results can be viewed in a web map or application (Portal) or desktop. Notifications will be received as zones are reached or when the vehicle is speeding.
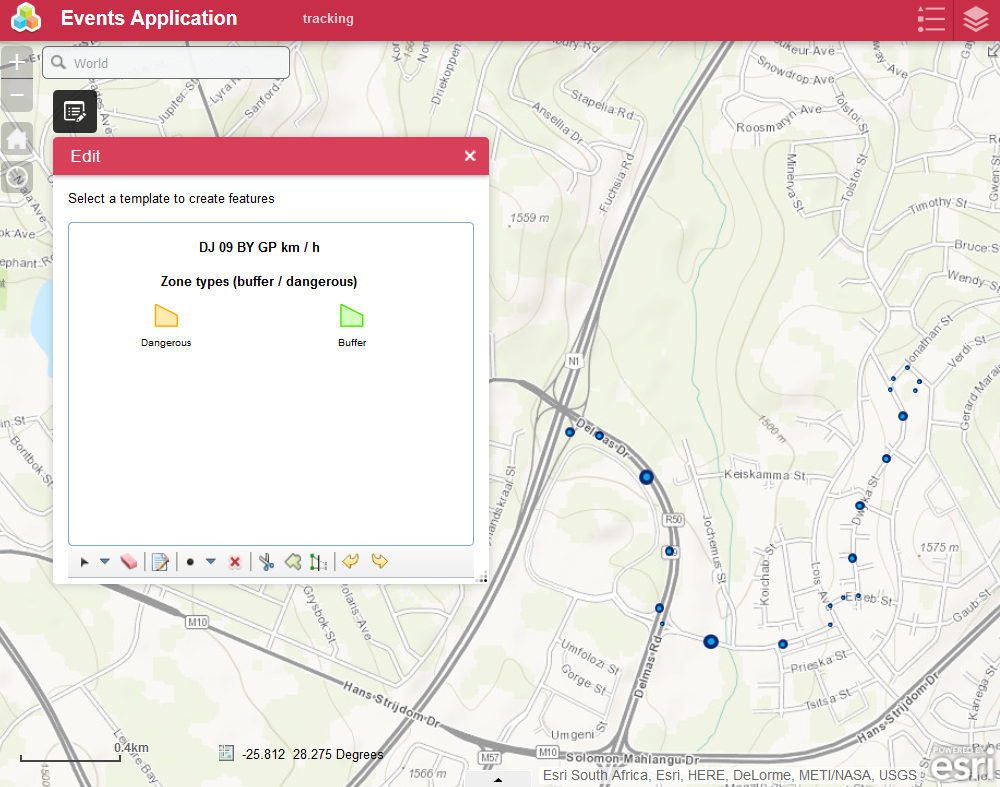
Use the 11 steps above to set up your GeoEvent Extension for Server. The data can now be viewed in a web map from virtually any device.