 We all know that ArcGIS comes with a very large number of out of the box apps that seemingly do just about everything! Surprisingly though, we often come across the problem of finding an app that “fits just right” with what you need to achieve. The solution to this is to build your own app using an API or Runtime. The beauty of the ArcGIS APIs and Runtimes is that they extend the platform – meaning you can leverage all the power of ArcGIS such as Server, map services, web maps, popups, geoprocessing, etc all in a front-end that suits your workflow, user needs and styling choices. This may seem daunting, but don’t be fooled, anyone can do it!
This post will take you through some basic steps to create your own custom web application using a 3D scene. We will use the ArcGIS JavaScript API 4.0 to make the app.
1. Getting started – setting up your environment
Like I said, this is really simple. There are only two things you need. Firstly, you will need an ArcGIS Online subscription to make a web scene that we will load into our custom app
Secondly, you will need is a JavaScript IDE (editor) such as Notepad++ or WebStorm (link).
And that’s it, we are ready to go!
2. Creating the web scene
Log in to your ArcGIS Online account and click the menu option entitled “Scene”. This is a familiar interface very similar to the “Map” tool that lets you other webmaps. Use this tool to create a web scene with your own data layers, popups and symbology. In my example, I have added the provinces of South Africa as a layer and extruded them to show some 3D.
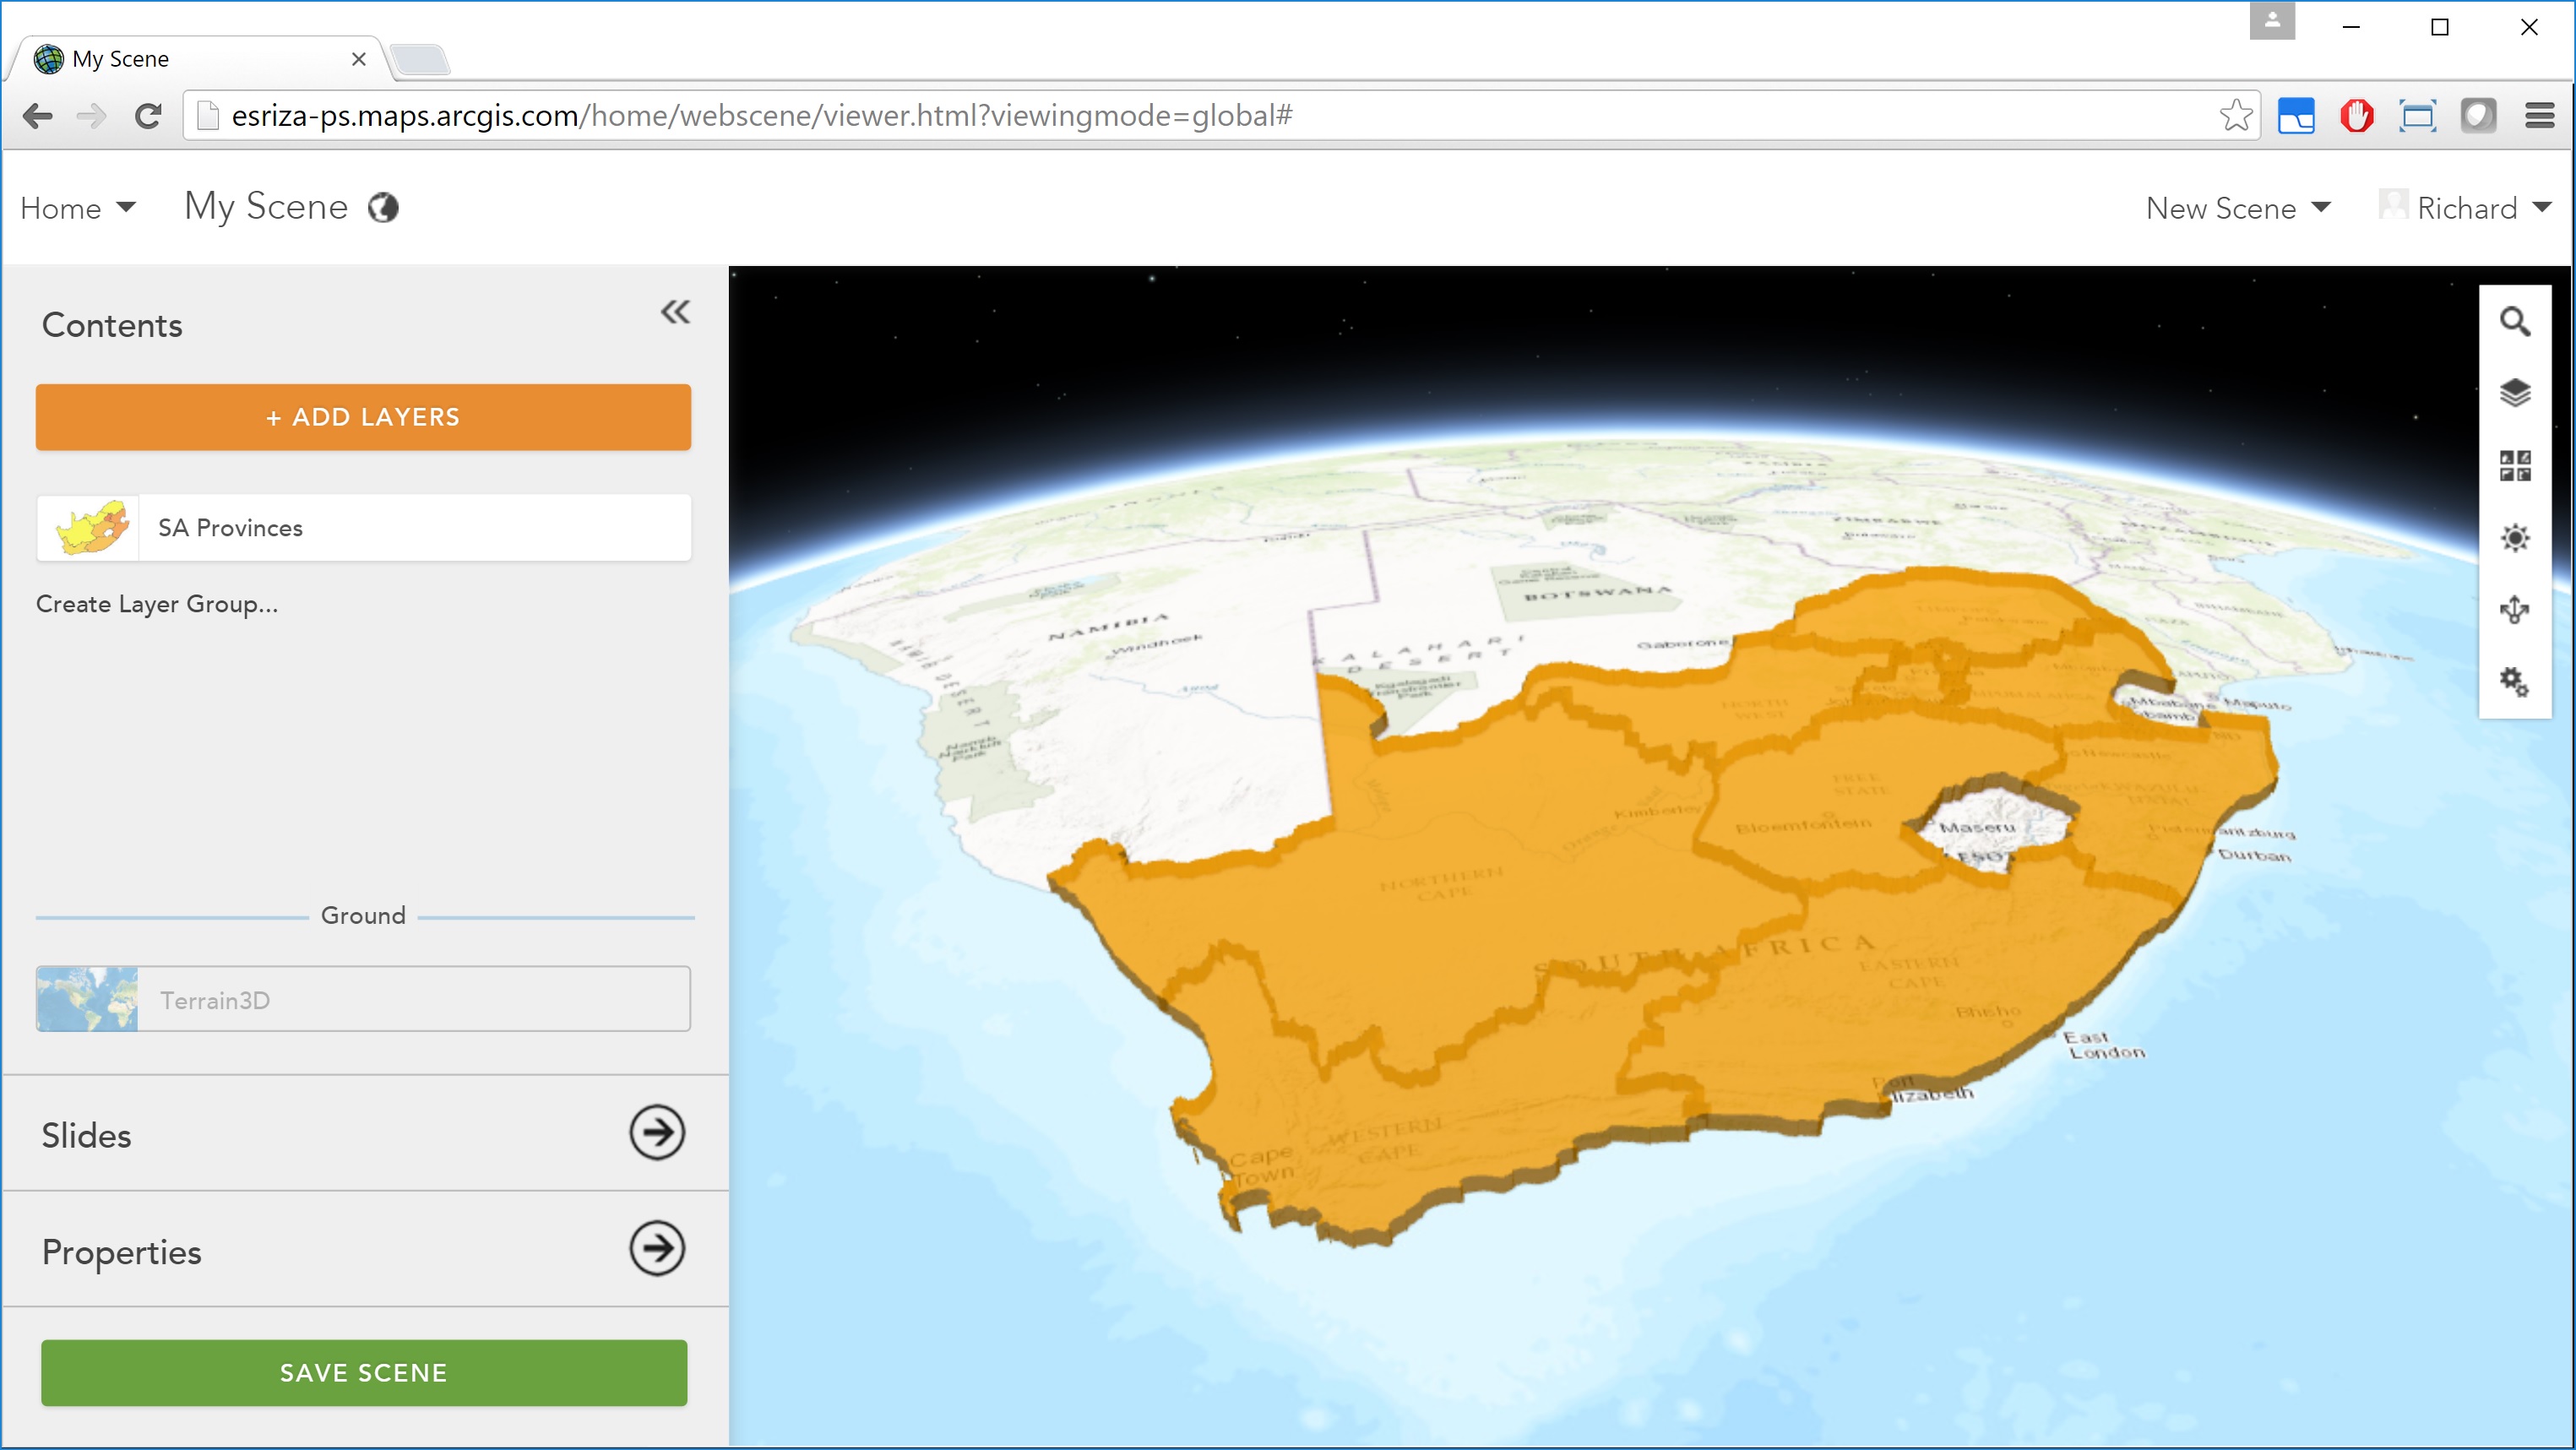
Creating a web scene in ArcGIS Online
Make sure to save the scene when you are done and take note (copy into notepad) of the item id for the web scene. You can grab this from the address bar in your browser. My id is “0390e2ec01fa488a847d4e413f015cd0”.
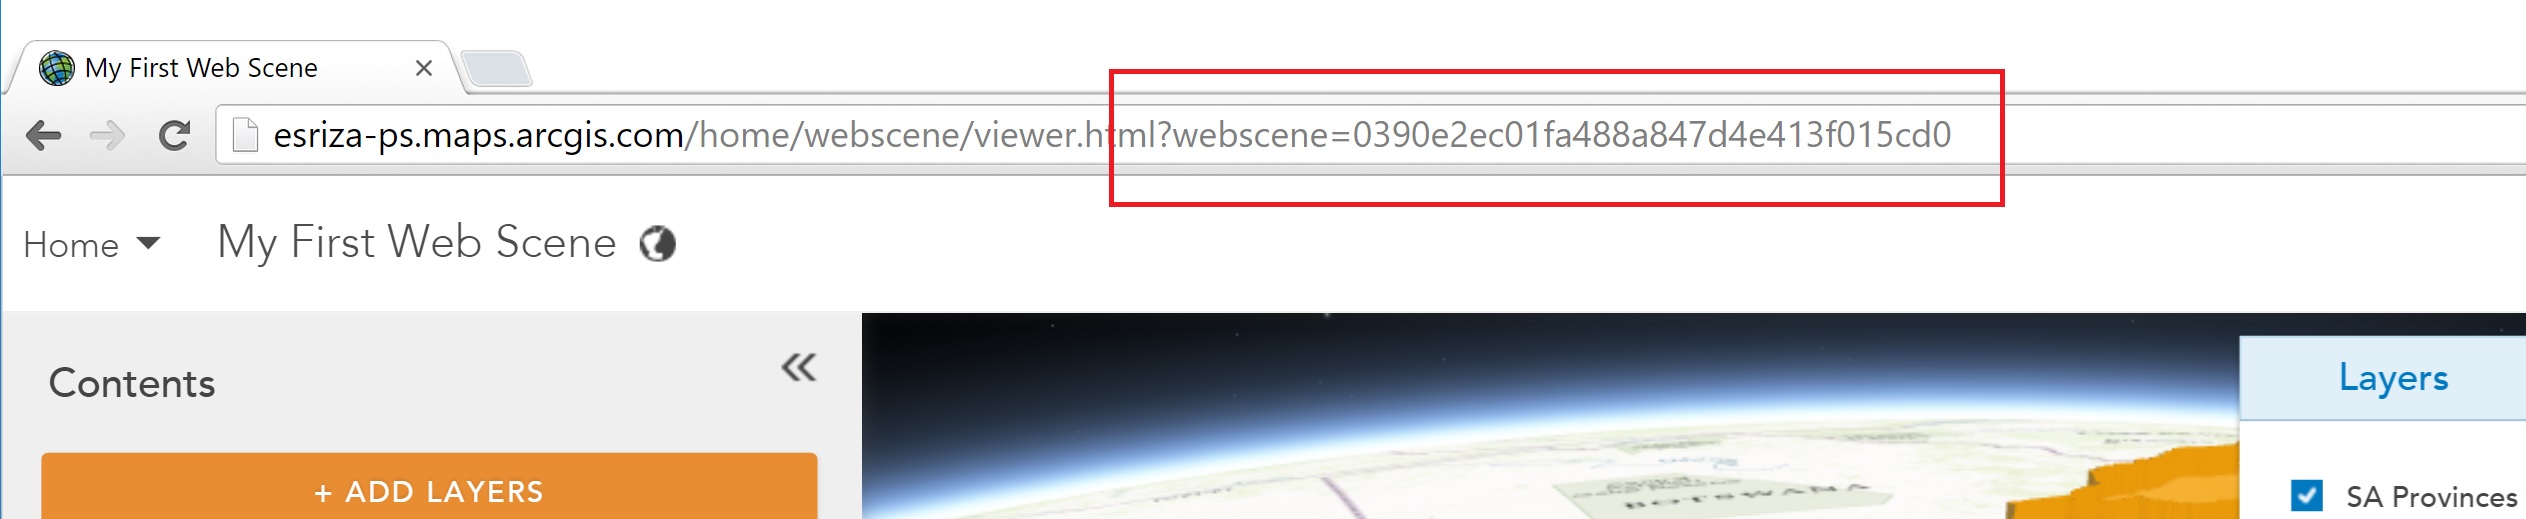
Getting the web scene’s ID
Note that to make things easier, you can share your web scene publically. This will avoid your app needing to authenticate you when opening it (i.e. logging in). In future, you can add security to your app as required.
More info on how to create a web scene, go to this link.
3. Creating your web page structure
Open up a new, empty html file in your IDE of choice. We will first put in the basic structure of the HTML page to get us going (TIP: I have created myself a template that I can re-use as a starting point each time I want to create a new app – saving me the time of creating the structure). An HTML page consists of some mandatory sections:
- HTML doctype declaration – so that a web browser knows that the page is an HTML file (and what version – we are using 5)
- Head – this includes all necessary ‘meatadata’ for the web page including the styling and logic (javascript)
- Title – be sure to set a readbale title that you will see on your browser tab
- CSS – this is the styling file and its easiest to pull in the CDN hosted Esri stylesheet
- Javascript libraries – this is the ‘core’ JS library that will enable all kinds of web mapping goodness, we will pull in the CDN hosted JSAPI from Esri (link)
- Javascript – this is the logic of your won app, here will enter our code to load a scene view and any other logic we want from the page
- Body – this is the HTML which provides the structure of the page using HTML tags (link)
Here is my basic skeleton template including the links to the CDN CSS and JavaScript libraries that make up the ArcGIS JavaScript API (v4.0):
<!DOCTYPE html>
<html>
<head>
<title>My First 3D Web App</title>
<link rel="stylesheet" href="https://js.arcgis.com/4.0/esri/css/main.css">
<script src="https://js.arcgis.com/4.0/"></script>
<script>
/* section for my custom code */
</script>
<body>
<!-- page layout will go here -->
</body>
</html>
More info on creating HTML pages, go to this link.
4. Building the HTML page structure
Before we can add a map (or other elements) to the UI, we need to create the structure of the page itself. Now, there are many ways to skin this cat which I wont go into in this post, but I am going to use a couple of layers (“DIV”s in HTML parlance) to layout my page. This is where you can really start to have fun – since you are in full control of everything, you can choose layout, colours, fonts, graphics, etc to make you page look great!
Here is the HTML layout code that is inserted into the “body” section:
<div id="wrapper" style="position: absolute; top: 0; bottom: 0; left: 0; right: 0; background-color: rgb(200,200,200)">
  <div id="mapPanel" style="position: relative; float: left; width: 60%; height: 100%">
  </div>
  <div id="mapDescription" style="position: relative; float: left; width: 40%; height: 100%; background-color: rgb(220,220,220)">
    <p style="margin: 10px; font: normal 10pt verdana;">Welcome to my very first 3D web app! You can click around and navigate the scene.</p>
  </div>
</div>
5. Adding the JavaScript “Scene View”
Since v4.0 of the ArcGIS JavaScript API, Esri now uses a new pattern for adding maps to the view. This is done by first creating the map (which is a container) and then adding a view to that map.
Here is the code for loading my map which is inserted directly into the <script> section:
require([
  "esri/views/SceneView",
  "esri/WebScene",
  "dojo/domReady!"
], function(SceneView, WebScene) {
  var scene = new WebScene({
    portalItem: {
      id: "0390e2ec01fa488a847d4e413f015cd0" // replace with your web scene's ID
    }
  });
  var view = new SceneView({
    container: "mapPanel",
    map: scene
  });
});
Note that I have entered the Item ID from the web scene I created earlier as the reference. This means that the logic will now create a scene container, find the scene item by its id and load that into the scene as a view. Too easy!
More info on the ArcGIS JavaScript API, go to this link.
6. Revel in your mastery
And that’s it! You have created your first 3D web app. To view it, simply open the HTML page in your favourite browser (JSAPI v4.0 is supported in Chrome, Firefox, and IE 11).
Here is a screenshot of my first app:
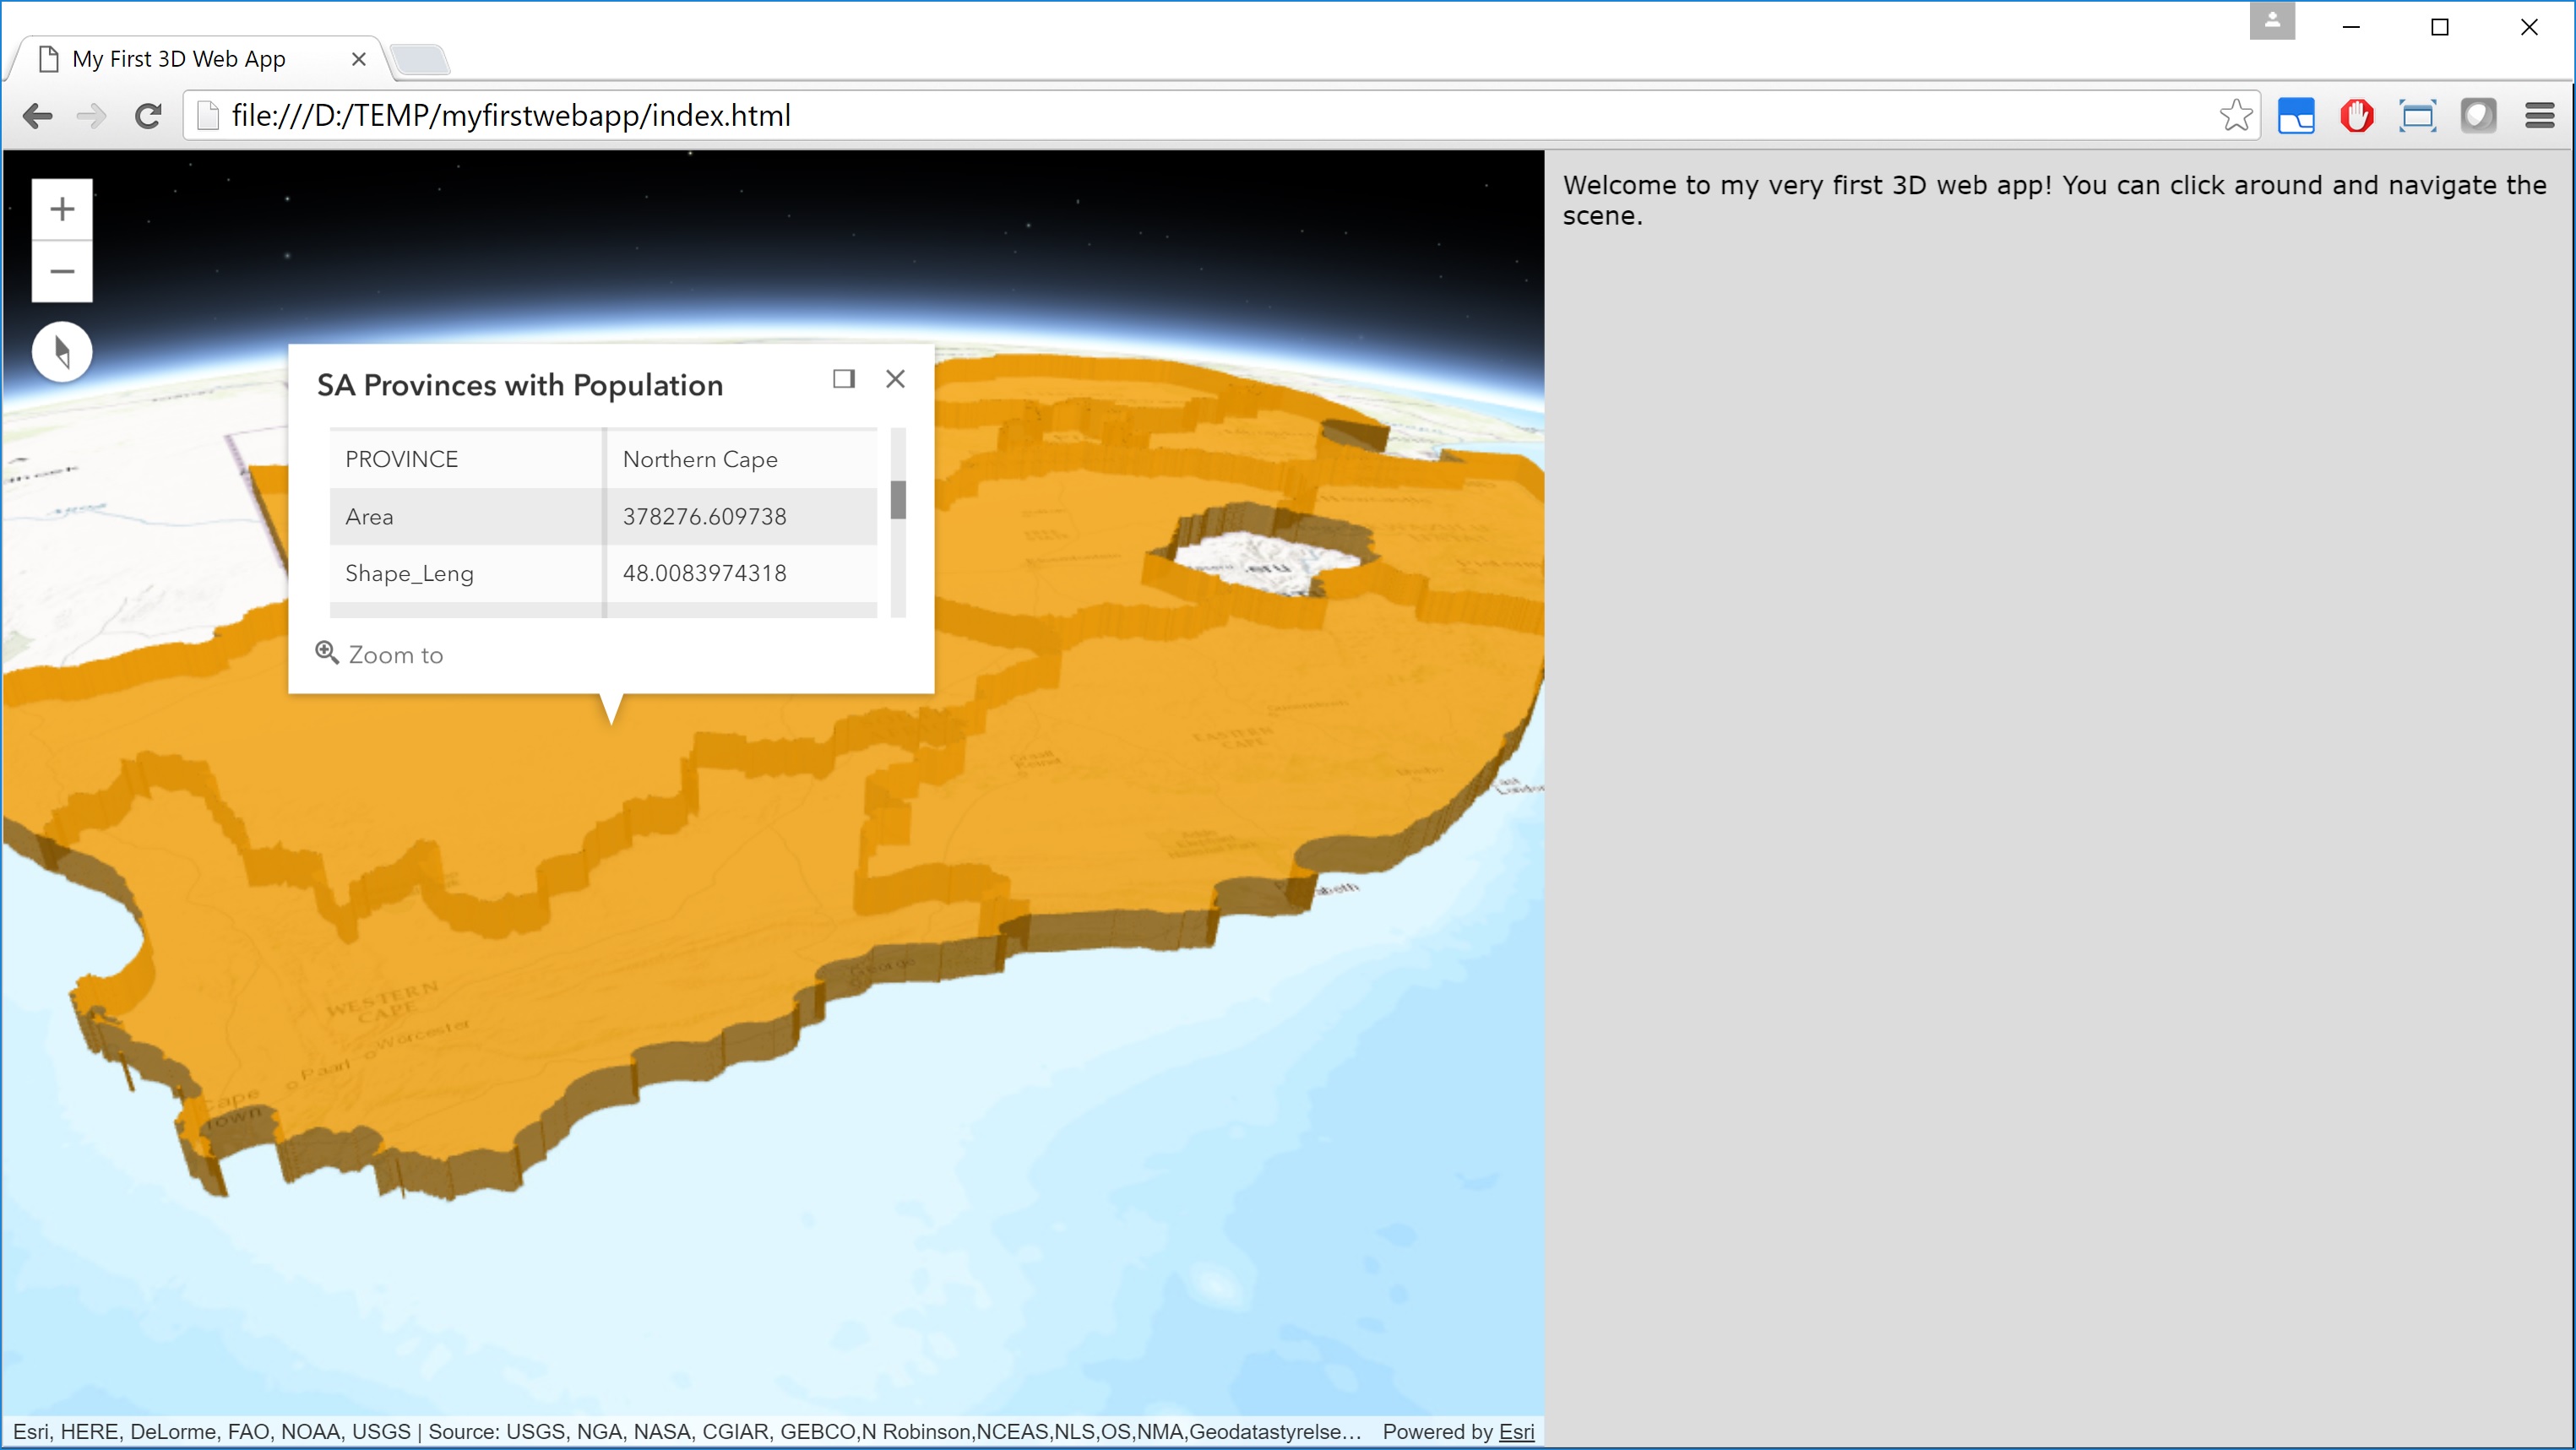
My First 3D Web App!
Happy coding!
– Richard